Friday, January 8, 2010

"First Contact" Part 2

If you've read through Part 1 of this walkthrough, then the next part of this won't be too different. I'm just continuing to use the same techniques for the rest of the creature's body, filling in, smoothing, and refining the paint.


Again, I continue refining the paint, and then begin adding details and the counter-shading pattern on its belly. I've added a glowing lateral line along its side, as well. The process for the glow is pretty simple. I used the pen tool to make my line on a separate layer, and traced it with pure white. I made it a little fuzzy with a bit of gaussian blur, and then set the later to "Overlay" mode. And voila--glow!
You'll notice that I'm painting directly over my rough sketch of the diver. That's okay, because right now I'm focusing on the creature. The diver is in front of it in the water, so I'll add him back into the picture later.

Here is some detail of the creature's arms, again using the same painting technique that I've employed on the rest of its body.

Now comes a fun bit--and also an easy one. I'm adding biolights to the creature's head and its tail. To do so, I simply create a pattern of white, slightly fuzzy dots across its skin the pattern I want. Once that's finished, I just duplicated the layer and set it to "Overlay."


And that finishes off the creature! Part 3 finishes up the rest of the painting.

Tuesday, January 5, 2010

Monster time! Part 1

Often, I like to work on several images in parallel to keep myself from getting bored or tired of a single painting. So, today, I started a new one, based on the Greek anthropophage and depictions of the legendary Blemmyes creature.

Horror is not a genre I delve into often, but I figured it's always good to branch out. This creature gives me the chance to do some fairly realistic figure work, and also to take a rather ridiculous monster and try my hand at making it a bit more scary.

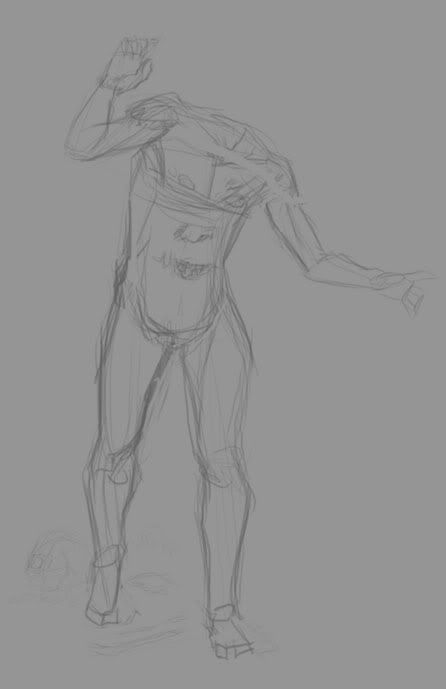
My first step was to find a good source image for the pose. I wanted a fairly natural pose, but one that would look slightly "off" in its stance, once I did away with the head. This photo from Felixdeon on dA fit the bill perfectly. The lighting in the shot is also pretty interesting, which is a bonus.

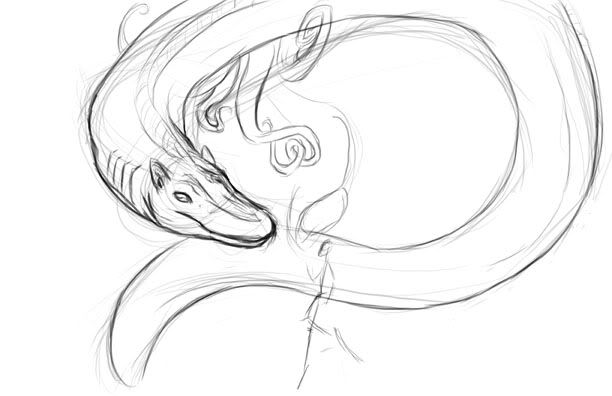
With a pose selected, my next step was to begin my sketch. Starting out rough and gestural is the best way to begin. It's so much easier to fix mistakes when you're at this stage, than when you're five hours into the painting.


Next, I refined my lines and started adding some background objects for interest. The bones are based on various pics from Skulls Unlimited.


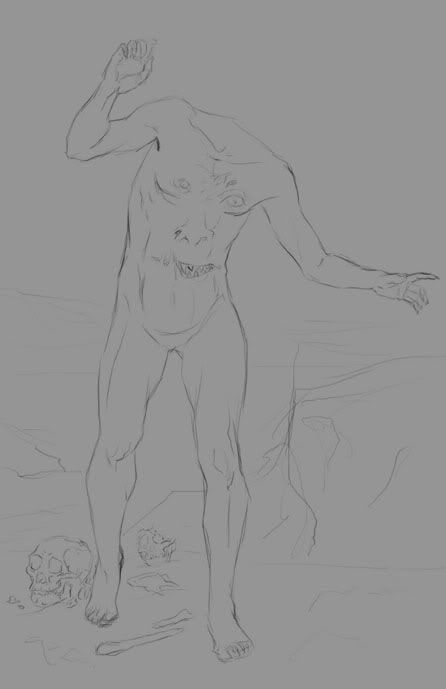
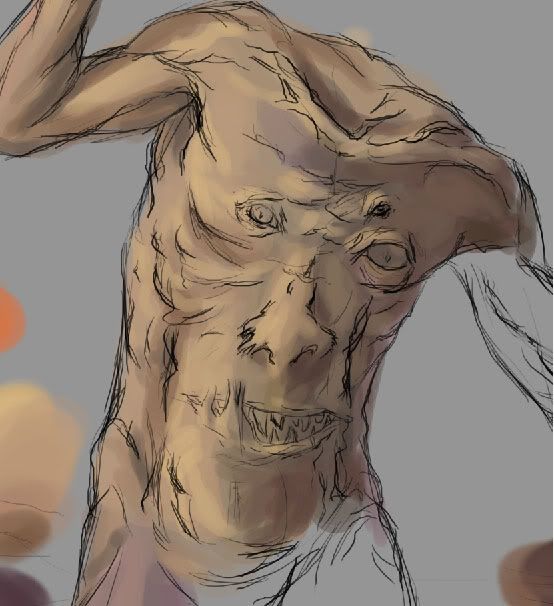
I felt pleased with the figure at this point. But as a monster, the image was definitely lacking creepiness. Instead of going for a bloody, gory "ick," I decided to take a different route, and over-emphasize the musculature, veins, and tendons. While muscles are normally thought of as attractive in Western aesthetics, you can take it far enough that it becomes grotesque. For reference, I looked up musculature diagrams and drawings by Michaelangelo. An art instructor of mine once joked that an arm on a Michaelangelo figure looks like a bag of walnuts, because you can see every single muscle. Sounds like a good start towards creepy!


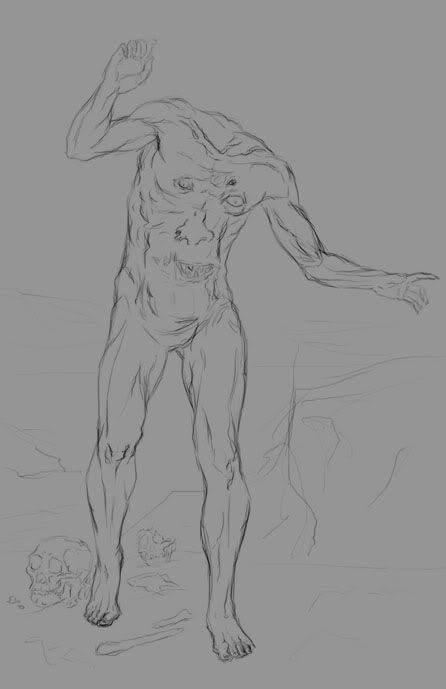
And there we have it! The finished drawing for the figure and a loose background. For the coloring, I referred back to my stock again. (I hope you can all forgive me the sin of censorship, but I'm hosting my images on Photobucket.)


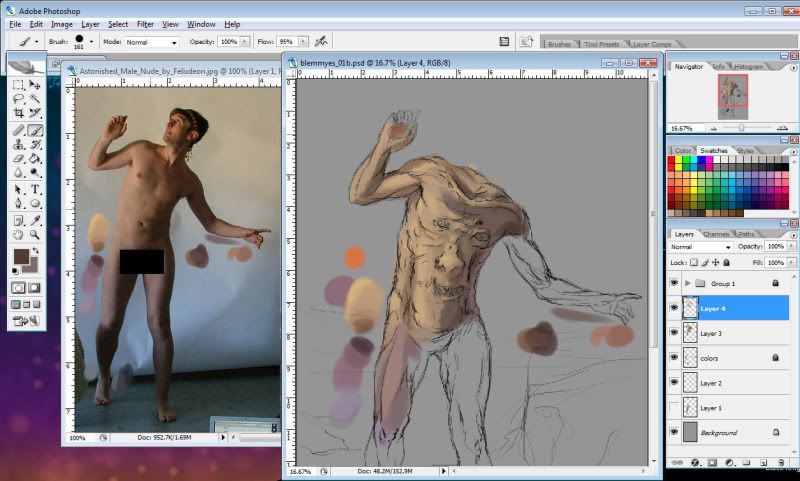
I gave my creature a pale skintone, firstly because it's easiest to match the model, and secondly because veins show best under paler skin.

Despite the skin being pale, though, it's by no means different shades of the same color. It's a combination of several hues. The lights are mostly yellow-oranges, with orange-reds for the midtones, and red-purples for the darks. There are some blues worked into the darks, as well. As I said in my last post, it's really important to use complementary colors.

To begin, I'm just roughly applying color. The play of light is similar to the lighting on the model, but the more exaggerated muscles, (as well as the face, obviously) change things a bit.

Here's a detail view.


That's all for part one! I'll continue with more work on painting the figure and details in Part Two.

Thursday, December 31, 2009

"First Contact" Part 1

I'm gonna start things off with my process for "First Contact" as requested by my buddy Rogue.

The first step is the drawing. I'm working 100% digital on this one, sketching with my tablet directly into PhotoShop. Since my lines won't show up in the final image, I can be as messy as I like. The important thing is composition.


I used a lot of references for this. I have a sheet for this creature, specifying its anatomy. I also spent some time browsing images of octopi to get a solid idea of how the tentacles should be positioned. The one thing I wasn't satisfied with is how much of the "canvas" the creature takes up--I decided it would be better to leave the environment more open.

In underwater scenes, lighting is crucial to make your scene believable. Since I'm not a diver, I went with photo-refs again to determine the play of light. I found this photo via Google images., and mimicked the lighting as a starting point. The background will change more, later.


I have my lines on a separate layer, with the rough colors underneath. It's pretty flat now, only serving as a guide. I added a few sketchy bubbles to suggest movement. The background is made with simple strokes blurred to give a fuzzy "spot light" look, as in the ocean photo.

With the rough colors done, it's time to start the fun part--painting!


I have the "Other Dynamics" setting for my brush turned on, allowing the pen pressure of the tablet to control the opacity and flow. I tweak those settings manually, as needed. But usually, I leave the main opacity at about 60% most of the time, and slowly build up layers of color. Once I've got a base of smooth color, I start adding value and adding complements.

This is another really crucial element of a painting--one that a lot of people neglect. Wherever you have a shadow, you need to include in it the complement (i.e. opposite color) of your base color. By blending orange into my dark blue, I can get a richer shadow color.


Part 2 continues this walkthrough.