


You'll notice that I'm painting directly over my rough sketch of the diver. That's okay, because right now I'm focusing on the creature. The diver is in front of it in the water, so I'll add him back into the picture later.
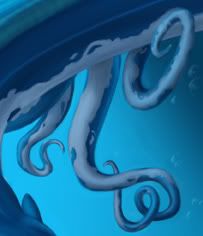
Here is some detail of the creature's arms, again using the same painting technique that I've employed on the rest of its body.
Now comes a fun bit--and also an easy one. I'm adding biolights to the creature's head and its tail. To do so, I simply create a pattern of white, slightly fuzzy dots across its skin the pattern I want. Once that's finished, I just duplicated the layer and set it to "Overlay."
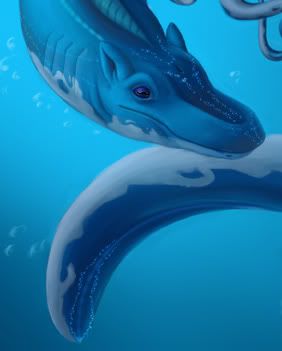
And that finishes off the creature! Part 3 finishes up the rest of the painting.
0 comments:
Post a Comment