Continuing from
Part 2, it's time to polish up the image and work on the environment.
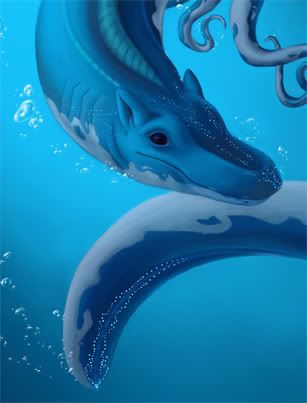
I began by adding some bubbles. This part of the painting shows how important observation and research is. When most of us think of bubbles, with think of a perfect sphere, like a soap bubble. Underwater, however, that's not the case at all. Air bubbles in a liquid are kind of odd and deformed because of the liquid around them. That seems like common sense, but it's something I hadn't consciously thought of until I looked up reference images of air bubbles.
The next thing I noticed when looking at air bubbles, is how the light affects them. They're lit on top, of course, because of the sun shining through the water. But they also have highlights on the side opposite where the sun hits them, because it passes through the bubble. Lastly, there's a dark "rim" near the bottom.
The animation below shows how to paint bubbles, from start to finish. I only used two colors for every bubble: a color a few shades lighter than the water surrounding the bubble, and a color that's a few shades darker. Under the "Other Dynamics" tab of the brush settings, I had "Opacity Jitter" and "Flow Jitter" set to "Pen Pressure".

All the bubbles are done in the same way, with different shapes and sizes. I probably spent another half hour or so just painting the rest of them. Repetitive portions of a painting can seem like a pain, but if you decide to enjoy it, the work will be relaxing instead of tedious.
The next thing I did was revise the biolights on the creature. I didn't like how soft the original set was, so I reworked it. Making the lights a little more solid was a definite improvement.
For a little more interest, I decided to give this creature some little symbiotes, similar to the cleaner fish that attach themselves to sharks. They get some biolights, too.
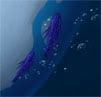
Now it's time for the environment. Because this scene is deep underwater, and the landscape is in the distance from the creature, the environment shouldn't be heavily detailed. The lighting, too, dictates that it should be mostly silhouettes. Quick, sketchy brush strokes are perfect for making seaweed and rocks caked in silt.

The final bit of the painting is actually to remove something: the diver. Looking at the painting, so far, I decided that the diver was a distraction, and broke up the composition. Sometimes what you leave out is just as important to a painting as what you put it.
And voila, the final image!